VEX GO: Drawing a Rectangle Partitioned into 2 Equal Parts
Here is a fun way for 2nd to 4th grade students to use coding and the GO robot to construct, identify, classify, and measure 2 dimensional figures. This activity explores some of the geometry and measurement standards relating to angles, quadrilaterals, parallel lines and perpendicular lines. See CCSS: 2.A.G.1 & 3, 3.NF.A.1, 3.G.A.2, and 4.G.A.2, as examples.
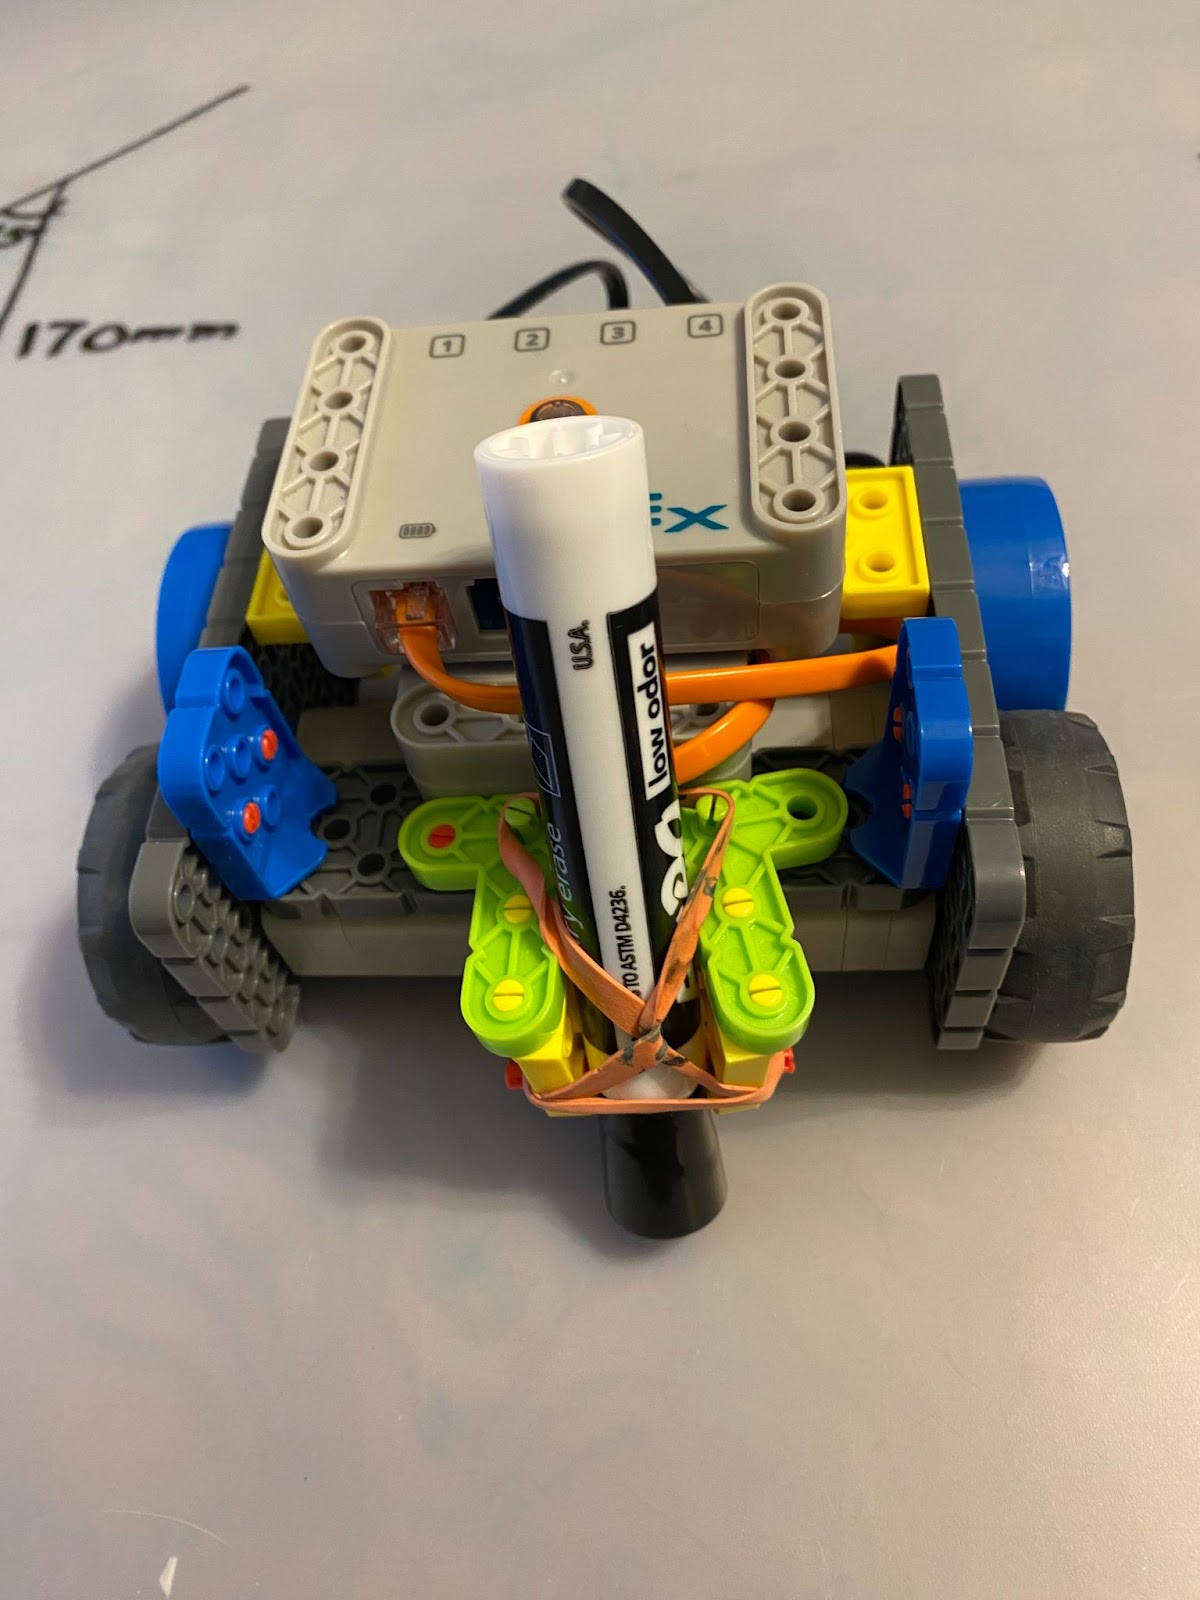
- Build the GO Code Base and add a standard dry erase marker to the front using 2 green angle beams, 2 yellow connectors, 2 green pins, 1 red pin, and a rubber band.
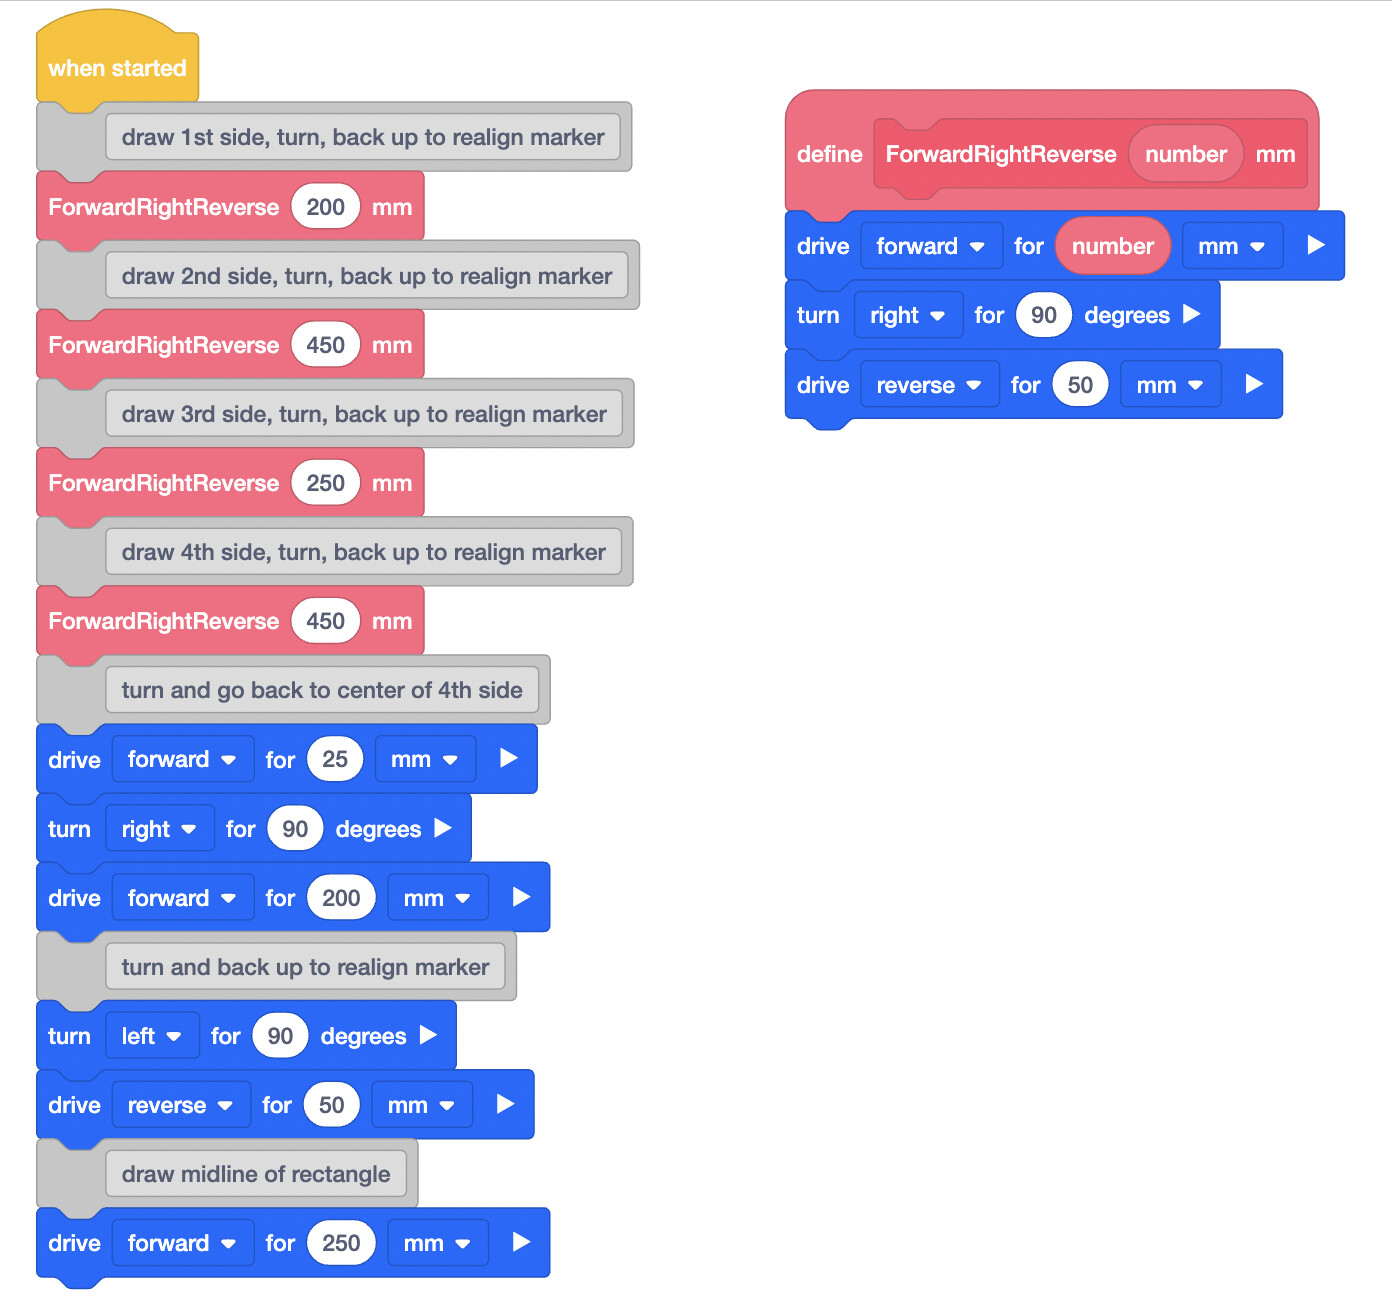
- Create a project in VEX GO to draw a rectangle and a line partitioning the rectangle into 2 halves. My sample code is below. I used “My Blocks” to draw each side, with 3 blocks repeated for each side. Since the marker is 40 mm in front of the center of the wheel base, it is not the center of the turning radius of the Code Base. I added in the “reverse” distances to realign the marker so it is touching the last completed line before it starts the next line. I ran iterations with various distances until I was happy with the way my finished partitioned rectangle looked. After the 4th side is drawn, the robot turns 90 degrees, backs up, then turns 90 degrees and backs up again to go back to draw the center line.
- Pair the brain and run the project, see linked video.
Drawing a Partitioned Rectangle - Use a ruler and protractor to measure the angles and side lengths to see how they compare to the angles and lengths you coded.
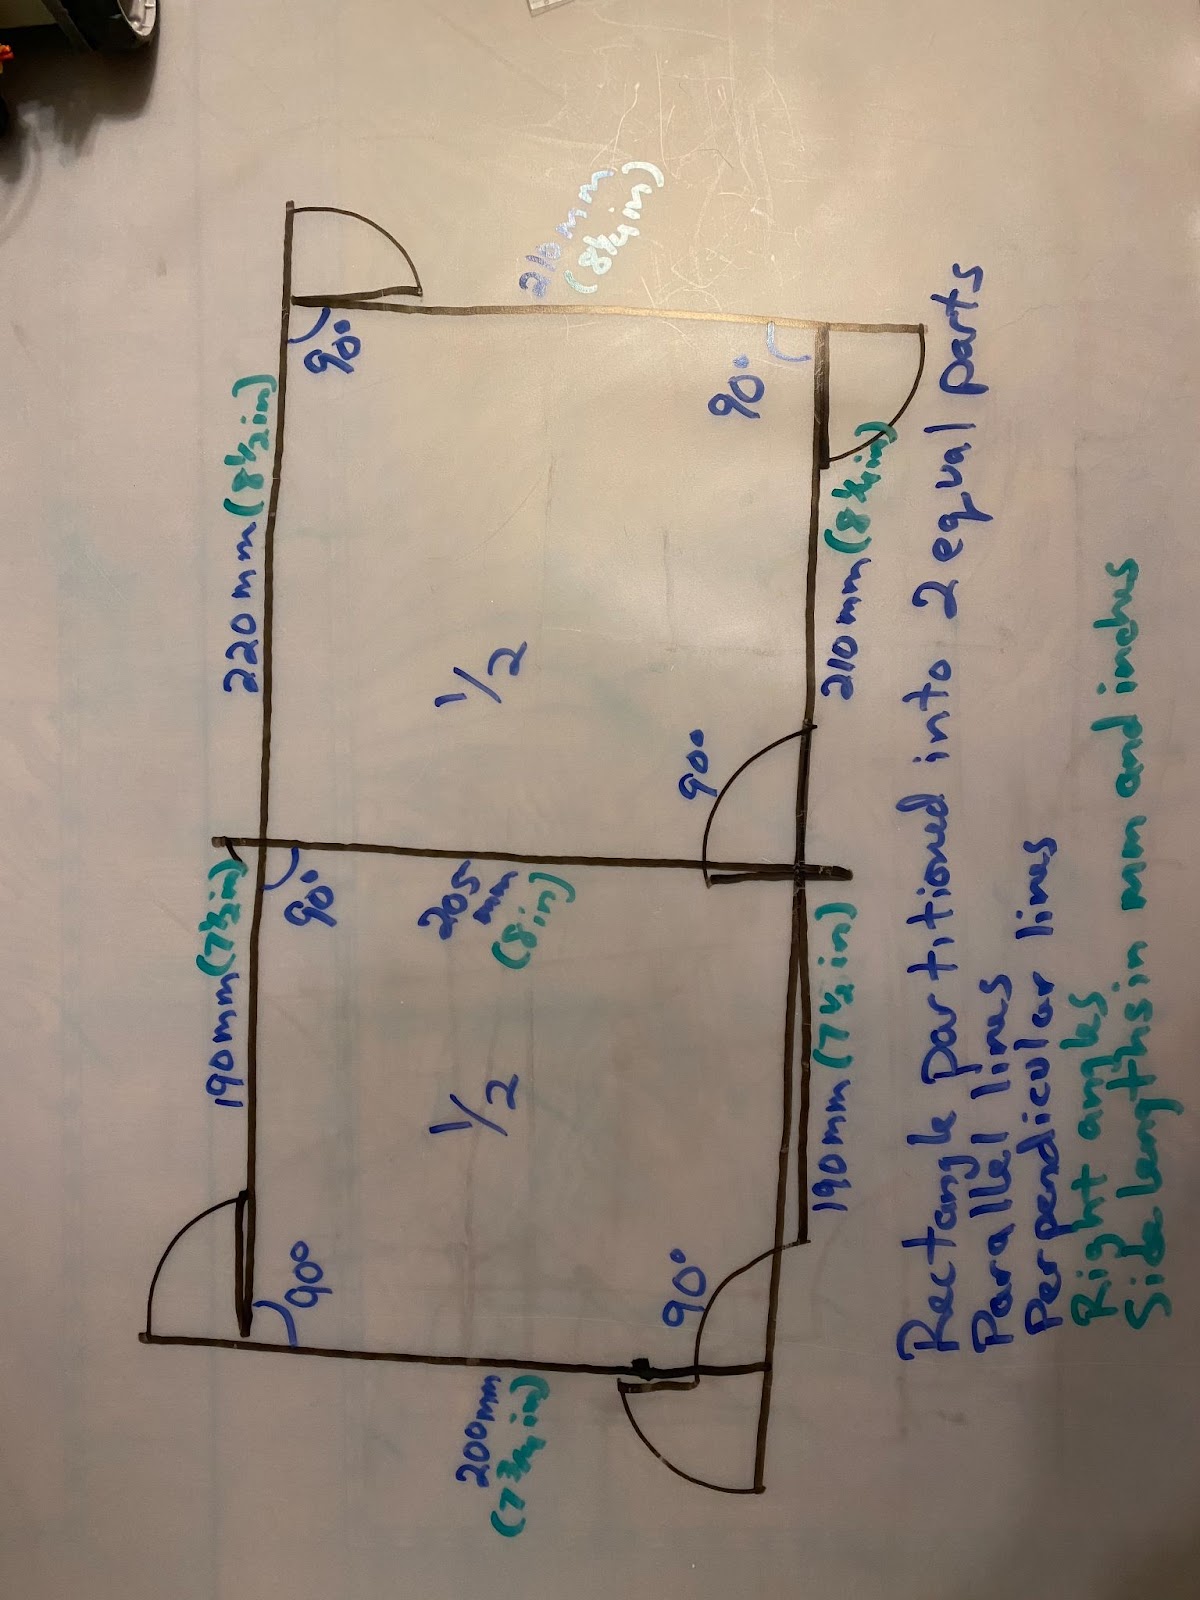
- My actual angles were within 3 degrees of 90 degrees. Since the center of the marker was about 40 mm in front of the center of the wheel base, the sides of the rectangle were about 40 mm shorter than the coded lengths. The differences of up to 10 mm between opposite sides of the rectangle are accounted for by the right angle differences of 3 degrees or less. The extra 40 mm on each line is shown in the extension of the line where the robot turns and reverses to realign itself. The center line does not exactly bisect the rectangle. Next time, I would reiterate different code lengths to locate the center line closer to the center. This code produces a rectangle with a partition in the center, 4 right angles, 2 sets of parallel lines, perpendicular lines, and 8 right angles.
- Lengths are shown in inches and millimeters/centimeters to incorporate another measurement standard (CCSS 2.MD.A.2).
- This could be an open-ended assignment in which students decide the type of quadrilateral, angle types, side lengths, and whether and how many partitions. Students can then answer questions about their construction. Happy creating!
