Many VEX IQ classroom activities and the STEM lab competitions require the use of a stopwatch. As a retired science teacher, stopwatches have always been a challenge for me in the classroom.
- Which teacher borrowed my stopwatches last?
- No, the batteries are all dead!
- How many students accidentally left the classroom with the stopwatches in their pocket?
- Half the students forgot to start their stopwatch.
- The other half of the students forgot to stop their stopwatch.
The introduction of stopwatch apps on smartphones and tablets, along with online stopwatches did make access to the stopwatches easier. However, I still had to deal with a school-wide no cell phone policy or watching students balance expensive tablets/laptops on their knees while doing an activity. Plus the forgetting to start or stop the stopwatch never went away.
My suggestion to you is - add a few blocks of code to your VEXcode IQ project and let your robot keep track of the time.
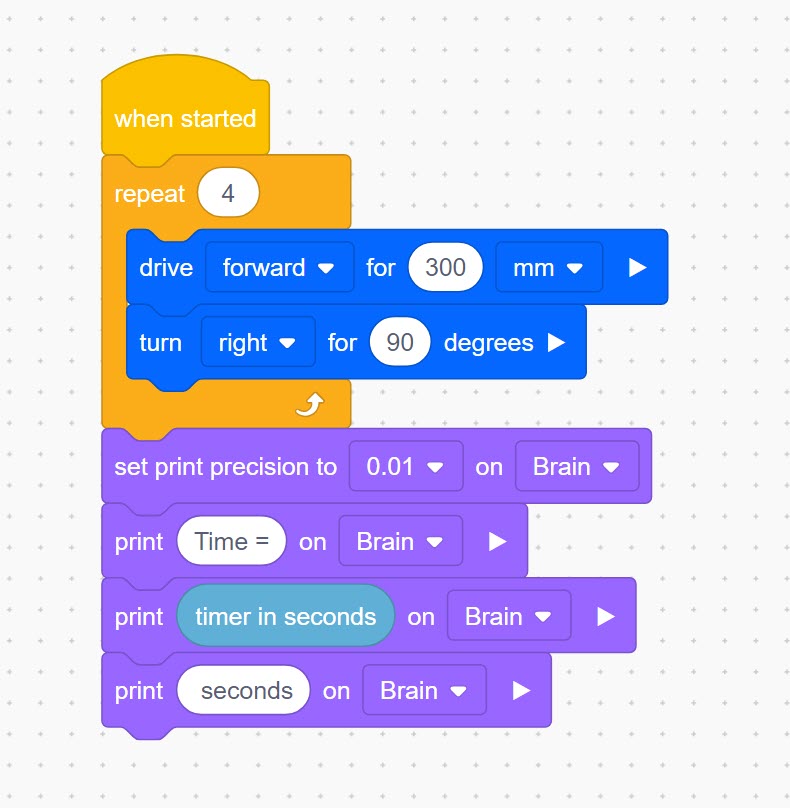
Timing an autonomous run
You can have your robot report out how long your autonomous run took by simply adding a [print] block from the Looks toolbox and include a Sensor value (timer in seconds) at the end of your project. Below is an example:
Stopwatch print blocks
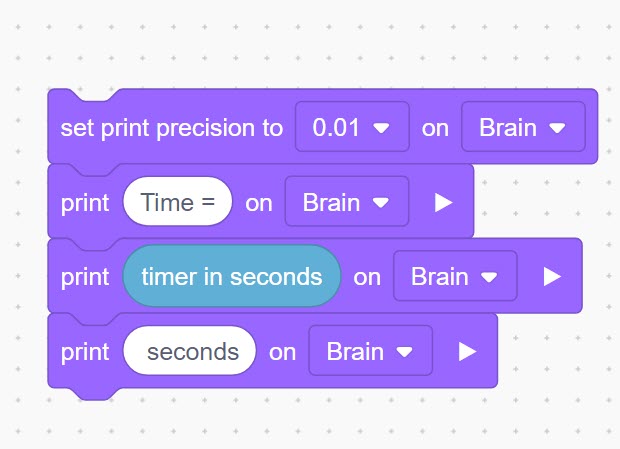
Added to the end of your autonomous project
Teamwork stopwatch
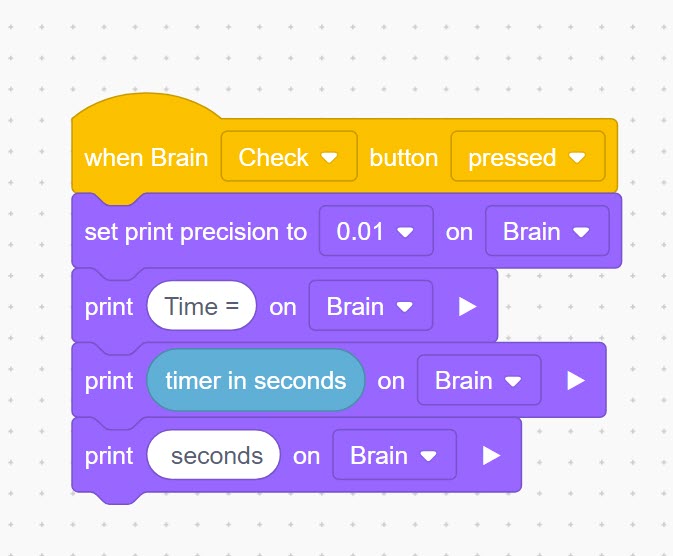
When the project requires driver control, you can have the time displayed on the Robot’s Brain by pressing one of the Robot Brain buttons. This can be done by adding a {when pressed} event block. Teams may find the fastest way to stop the timer for their run is to have a teammate ready to press the Robot Brain’s button instead of the driver having to put down the controller and press the button.
Using a Robot Brain’s button has two advantages. First, it is very obvious that the timer is stopped when the run is finished. Second, it adds additional teamwork cooperation to the competition. Here is an example of using the Robot Brain’s Check button to stop the timer at the end of the run:
Driver controlled stopwatch
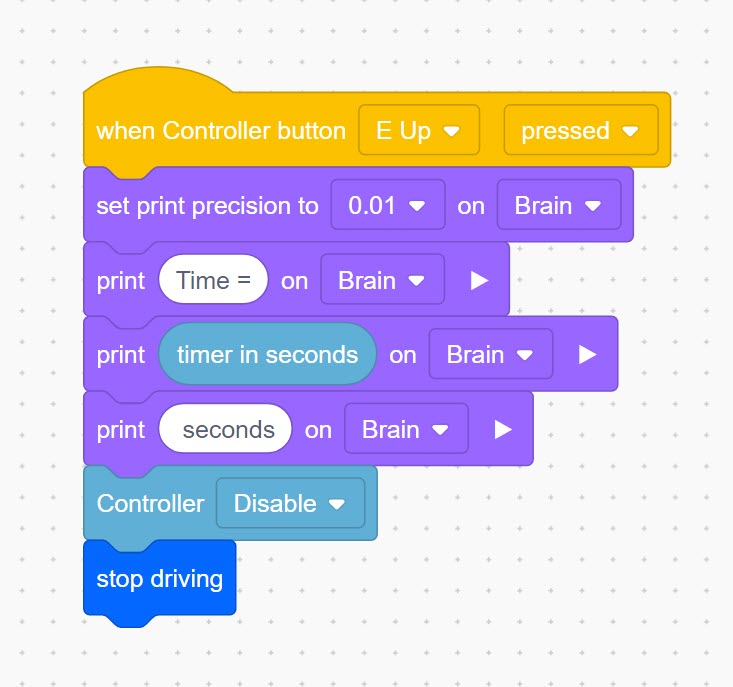
A {when pressed} controller event block can also use a controller button to stop the timer. However if this is used, I would suggest adding a [controller disabled] and a [stop driving] blocks. This prevents the driver from “accidentally” stopping the timer before they actually stop the run. If they stop the timer then they will not be able to drive the robot anymore. Here is an example using the controller’s E-up button to stop the timer:
Please let me know if you find these types of posts helpful. Also please post any of your suggestions to make implementing robotics into the classroom easier!

