Welcome to the thread for the “Engineering 101” Live Session! Here, you have the opportunity to discuss with VEX Experts and educators from around the world about drivetrains, mechanisms, chassis and more. You can also ask questions and provide suggestions for what you would like to see discussed during each session in this series. We’re so excited to learn with you! ![]()
1 Like
I’m really excited and passionate about this topic because I am a Mechanical Engineer myself. I want to use this Live Session as a way to show off and teach mechanical principles through VEX Robotics. If you are unsure how to apply these engineering concepts, or are seeking inspiration for engaging VEX-based activities, our Engineering 101 Live Session is perfect for you!
Just a reminder that tonight, Tuesday April 18 at 6:30pm Eastern Time, we will be hosting our first Engineering 101 Live Session. In this session, we’ll explore how to use gears to generate mechanical advantage with your VEX Robots. We will be examining how gears interact with one another, discuss various use cases, and learn how to determine when (and how) to implement a gear system. So if you are unsure how to begin applying these engineering concepts in your classroom, or want to see different ways to apply gears, I will see you tonight!
Let me know if you’d like to see something particular in the future, or if you have any questions/comments!
3 Likes
Thanks to everyone who attended last month’s session. In case you missed it, I’ve attached links to both the recordings as well as the slideshow used when we discussed all things gears!
Additionally, I’m excited to share that our next Engineering 101 Live Session will be today, Tuesday May 16th from 6:30pm-7:30pm Eastern time. I hope to see y’all there in which we will be discussing the differences between the V5 Smart Motor (11W) and the V5 Smart Motor (5.5W), which is now legal in VRC! This session is for those in VRC who are unfamiliar with the V5 Smart Motor (5.5W), as we’ll cover all the specs from size and shape to uses and applications. Please let me know if you have any specific questions, or if there is a topic you would like to see covered in the future! Hope to see y’all there ![]()
2 Likes
@Molly_Gomes I just wanted to tag you here as this is the thread for the Engineering 101 live session. You can see what Matt did last month ![]()
I’m also going to link your thread here, as the information you posted about Matt’s session last night was very helpful!
I’m not sure if you’re aware so I just wanted to let you know, from the Live Session page, not only can you see all of the sessions offered, but direct links to the recordings of previous sessions as well as the button that takes you to the direct community thread for that session ![]()
2 Likes
Thank you, Lauren! This is awesome!
2 Likes
I would like to learn more about using the sensor data that you see on the devices screen while running a program. What kinds of variables could we test and what sensor data might be the most interesting for kids to study? Do you have suggestions on testing procedures to get the best results, or are there experiments that you have tried that we could replicate?
It would apply very well to the Mechanical Advantage STEM Lab in particular. I would like to do the same with other STEM Labs and sensors as well.
1 Like
Great questions! I’ll let Matt think this one over for what activities we could possibly show ![]()
1 Like
Hey @Molly_Gomes thanks for being involved in last night’s session, and providing all the helpful feedback both here and in the other thread. I’ll be responding in this thread in regards to the Engineering 101 Session, so please let me know of any other questions/comments.
The new 88W rule allows for any mix and match of motors as well! I’ve attached an image from the game manual explaining it much better than I did regarding possible motor combinations.

Close! I showed an application of using the 5.5W motor on the intake of this year’s Herobot Striker. Pneumatics have been used in previous years’ games as another way to actuate mechanisms. With the new motor rule, teams can utilize more motor actuators on top of utilizing pneumatics, just to add another layer of complexity and customization. While I did not have any pneumatics on last night’s bot, incorporating them with the 5.5W motors would be really cool, and you could definitely do what you explained!
- Yep, two combined 5.5W motors (either through a shared shaft, gear/sprocket/chain train) would basically have a stall torque of 1.0 Nm as they’ll work together. You’ll note this stall torque is still lower than a single 11W motor’s stall torque of 2.1 Nm. This means it may be worth it to just use one 11W where you may be considering combining two 5.5W’s. Here is an article from the VEX Library all about information regarding the V5 Smart Motor (11W).
- Yeah I can work on something similar to that! For the time being, it would look very similar since the biggest difference would just be the motor change. I had this simple 3D build laying around for you to look at for more reference of a gear train utilizing the 5.5W motor in the meantime.
- Absolutely! Thank you for this feedback, as we can definitely create something to aid you in connecting pneumatics properly!
This is also a really cool idea. I’ll continue to brainstorm over ways we can incorporate this and show off fun stuff. Not only is it important to conceptually grasp why the robot is doing the thing it’s doing, but being able to see the math involved when it is doing these things would provide a much deeper understanding! Thank you for all the feedback you’ve provided, and I hope my message was of any assistance! We’ll be posting a recording of the previous Engineering 101 course soon in which we covered the motors, but in addition to that here are the slides that I used from last night. Let me know if there is anything else we can do!
1 Like
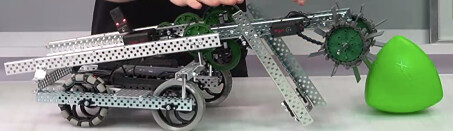
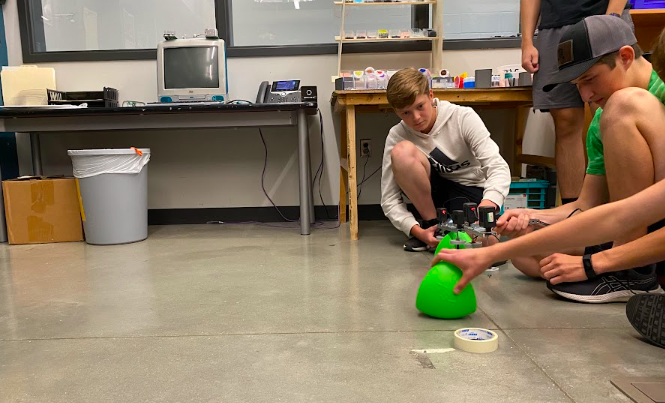
Check out our tri-ball shooters! The students built two of these, one with 11-watt motors and the other with 5.5-watt motors, then we tested to see how far they could shoot!
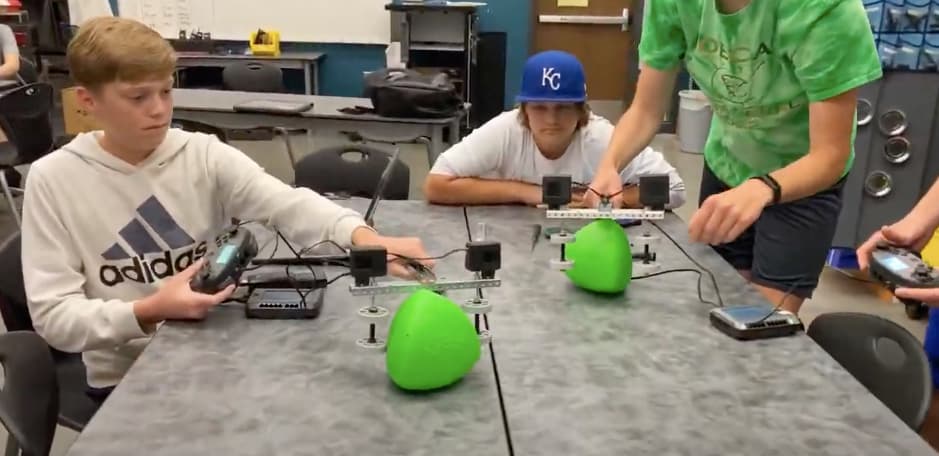
The students determined that the 11-watt motors clearly shoot with more force, but they think it might not be that significant when close enough to the goal. However, they think testing with a manual input is giving them inconsistent results, so they want to test again after designing an intake mechanism. @Matthew_Goodwin any suggestions for further research, design, and testing?
1 Like
@Molly_Gomes this is amazing! Thank you so much for sharing! I also wanted to share this page from one of our EXP STEM Labs that talks about Intake Design, it might be useful for your students ![]() I know @Matthew_Goodwin might also have some really cool intake design ideas or even Cadasio files for them.
I know @Matthew_Goodwin might also have some really cool intake design ideas or even Cadasio files for them.
We have the CatapultBot for EXP, the build might be able to be adapted for V5 as far as an intake goes if your students would like to use it for inspiration!
1 Like
These are PERFECT suggestions, Lauren!
I just had an idea. I think I will follow the V5 STEM Labs for my Intro to Robotics class next year, then have my Advanced VEX class work through the EXP labs and help me to develop V5 adaptations of those projects!
2 Likes
That sounds like a great idea! I can’t wait to see what the students come up with ![]()
1 Like
@Molly_Gomes this is really cool to see! As with most testing, you want to take out as much human factor as possible. Your students are on the right path as they determined inputting the triball themselves is resulting in a lot of variations. I would suggest setting up your tests exactly how you would find it in the wild (or in this case in a competition). Attaching their intake to a simple chassis would highlight multiple factors they may not have considered, as well as it would make results more consistent. Keep me updated as again, this is really cool to see!
1 Like
